Discover Our Blog
Stay up to date with the latest marketing, sales, and service tips and news.
How to add the COGS, Bulk Upload COGS, and export your products file.
This module gathers together all of your products’ details and statistics based on different time ranges.
Go to the ‘Seller accounts’ section on the top and enable the seller account(s) you wish to work with by selecting/deselecting the dot marker.
Note: You can also select/deselect “all” at the right corner of the box. Below, you will be able to add more seller accounts or manage them.

Settings
For this module, there is an ‘ASIN display’ option.
Note: By default, ASINs are grouped by parent. If you uncheck the box, parent ASINs will be hidden.

Tabs
Search tab to find your products by name, ASIN, or SKU

Below you will have 6 different tabs that will distribute your information depending on the period of time you want to work with from today to 30 days prior.
You have the products displayed by the seller account and you have the image of the product and its details so they can be easily identified.
If you click on the picture or the product’s title, it will open an overview graphic. Depending on the subject, these cards on top will show the average information and tendency from the selected period.

The next tab is the Sales Breakdown for that ASIN and you can hide or show the metrics below.

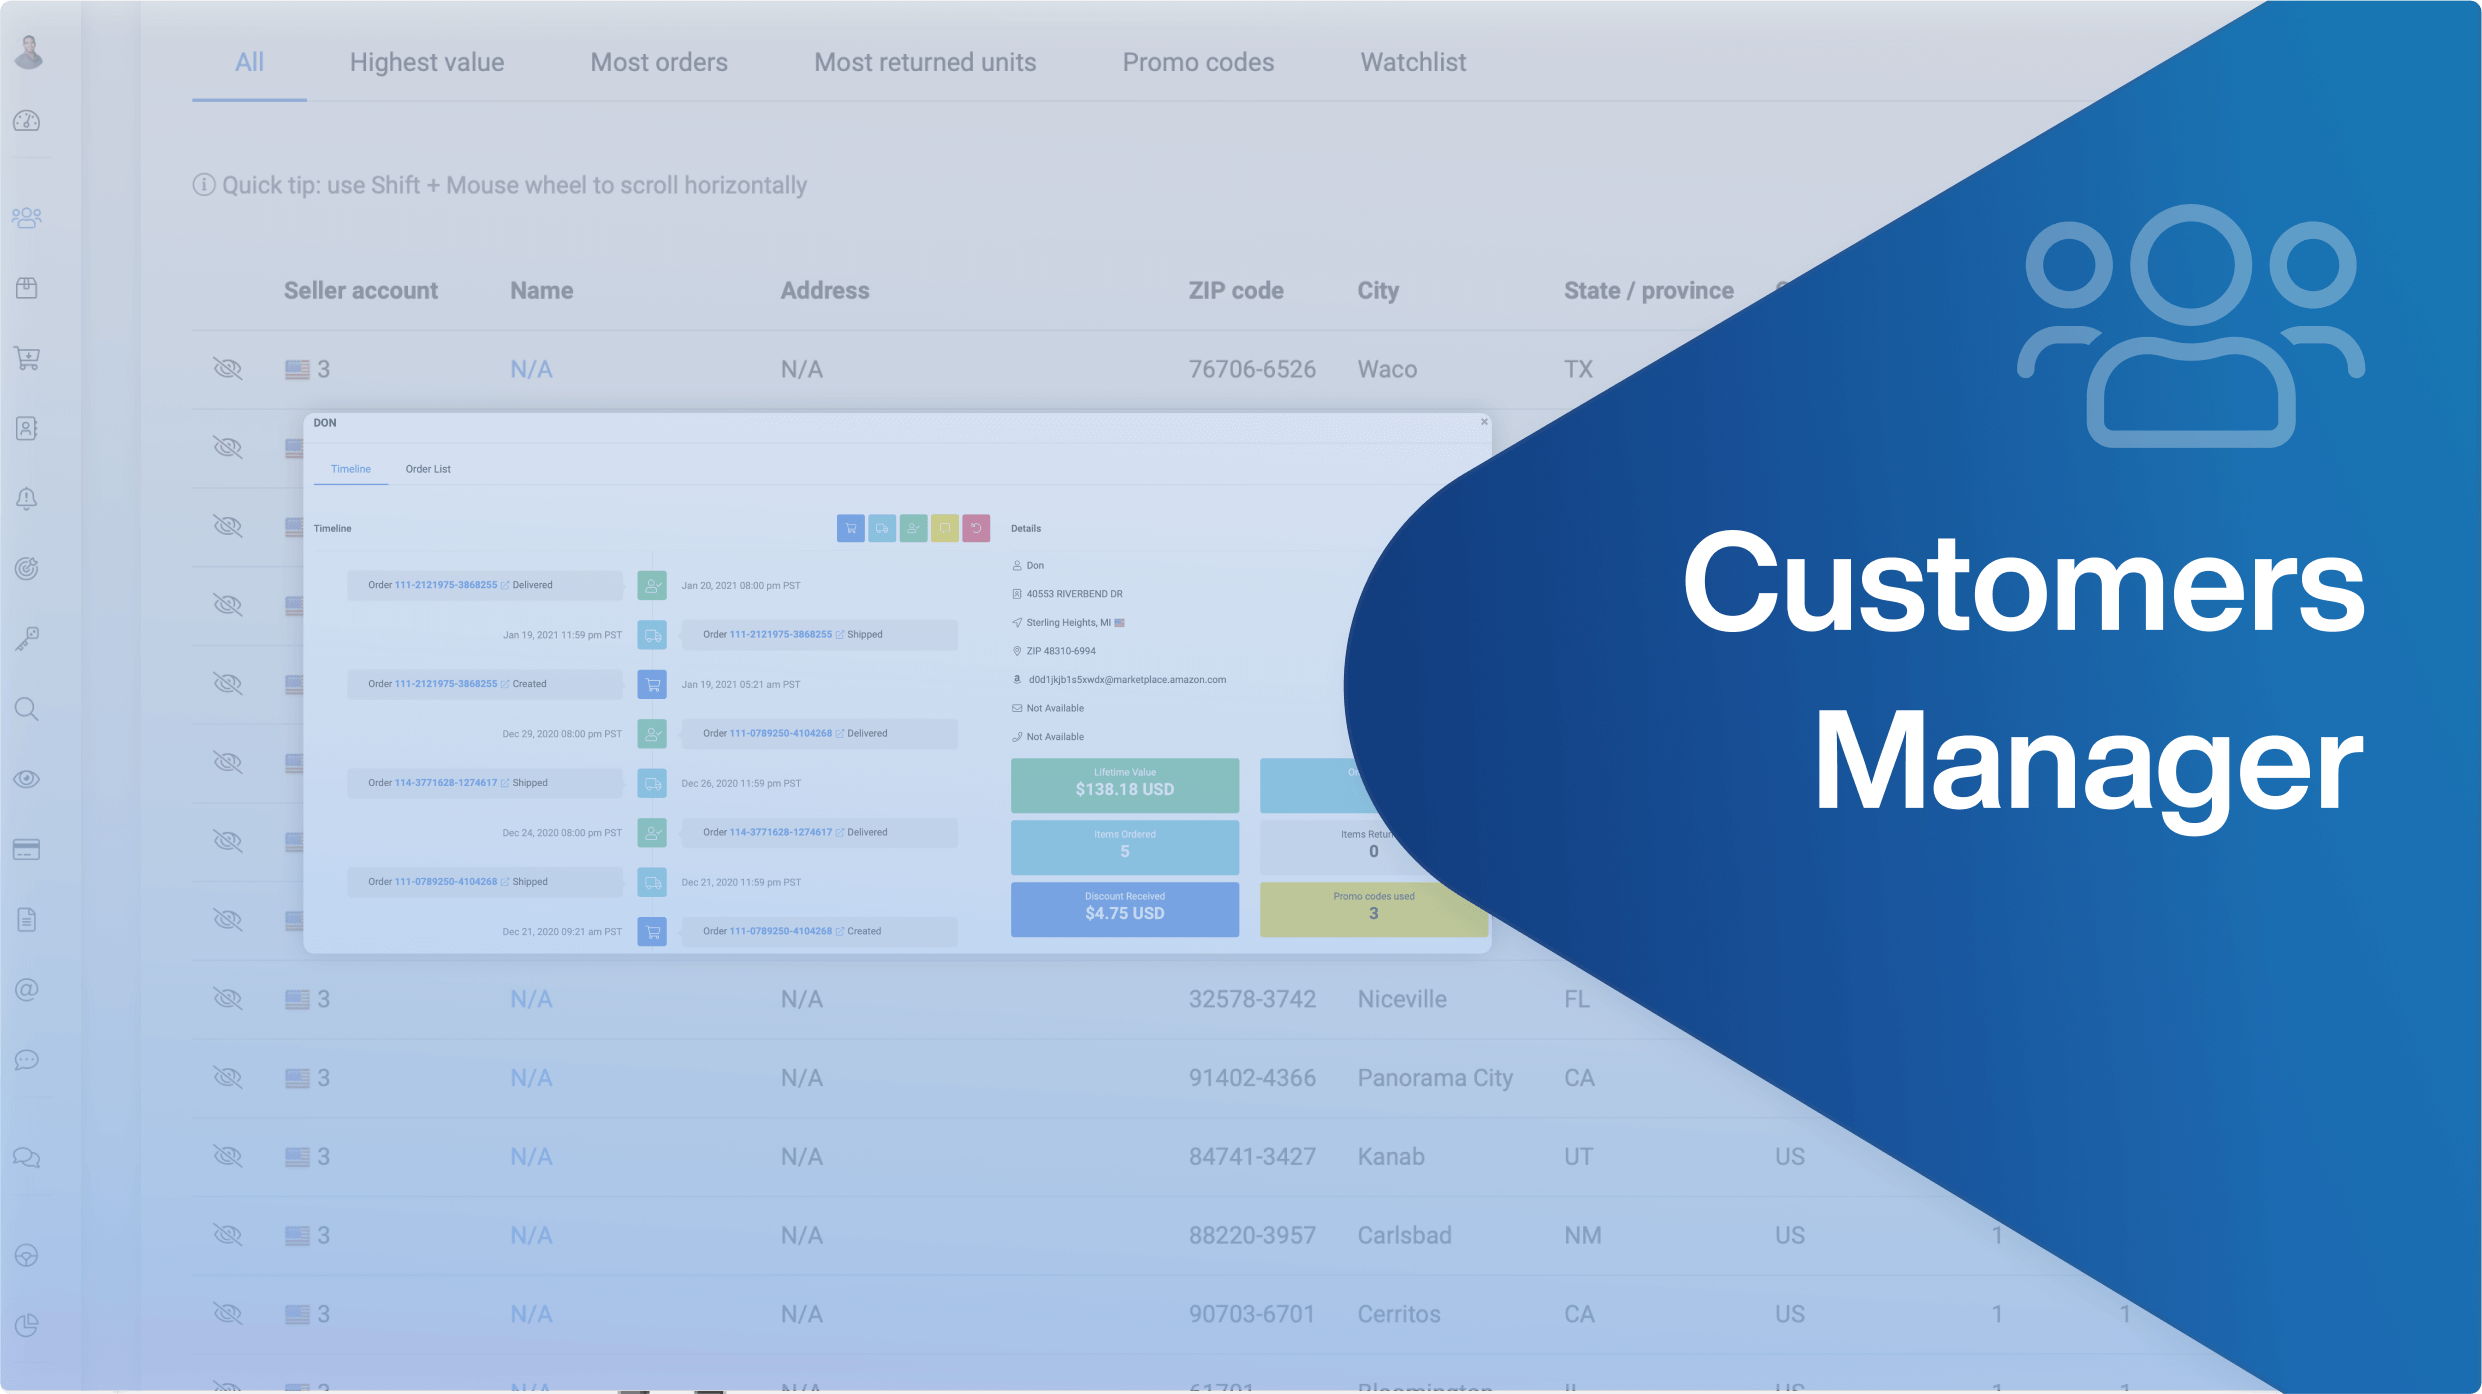
The alerts tab is directly connected to the Alerts module, and here you can easily enable the notifications you want to receive for each one of the products. To better understand each notification capability, click on the “ (i) info-bubble” located on top of each alert title.

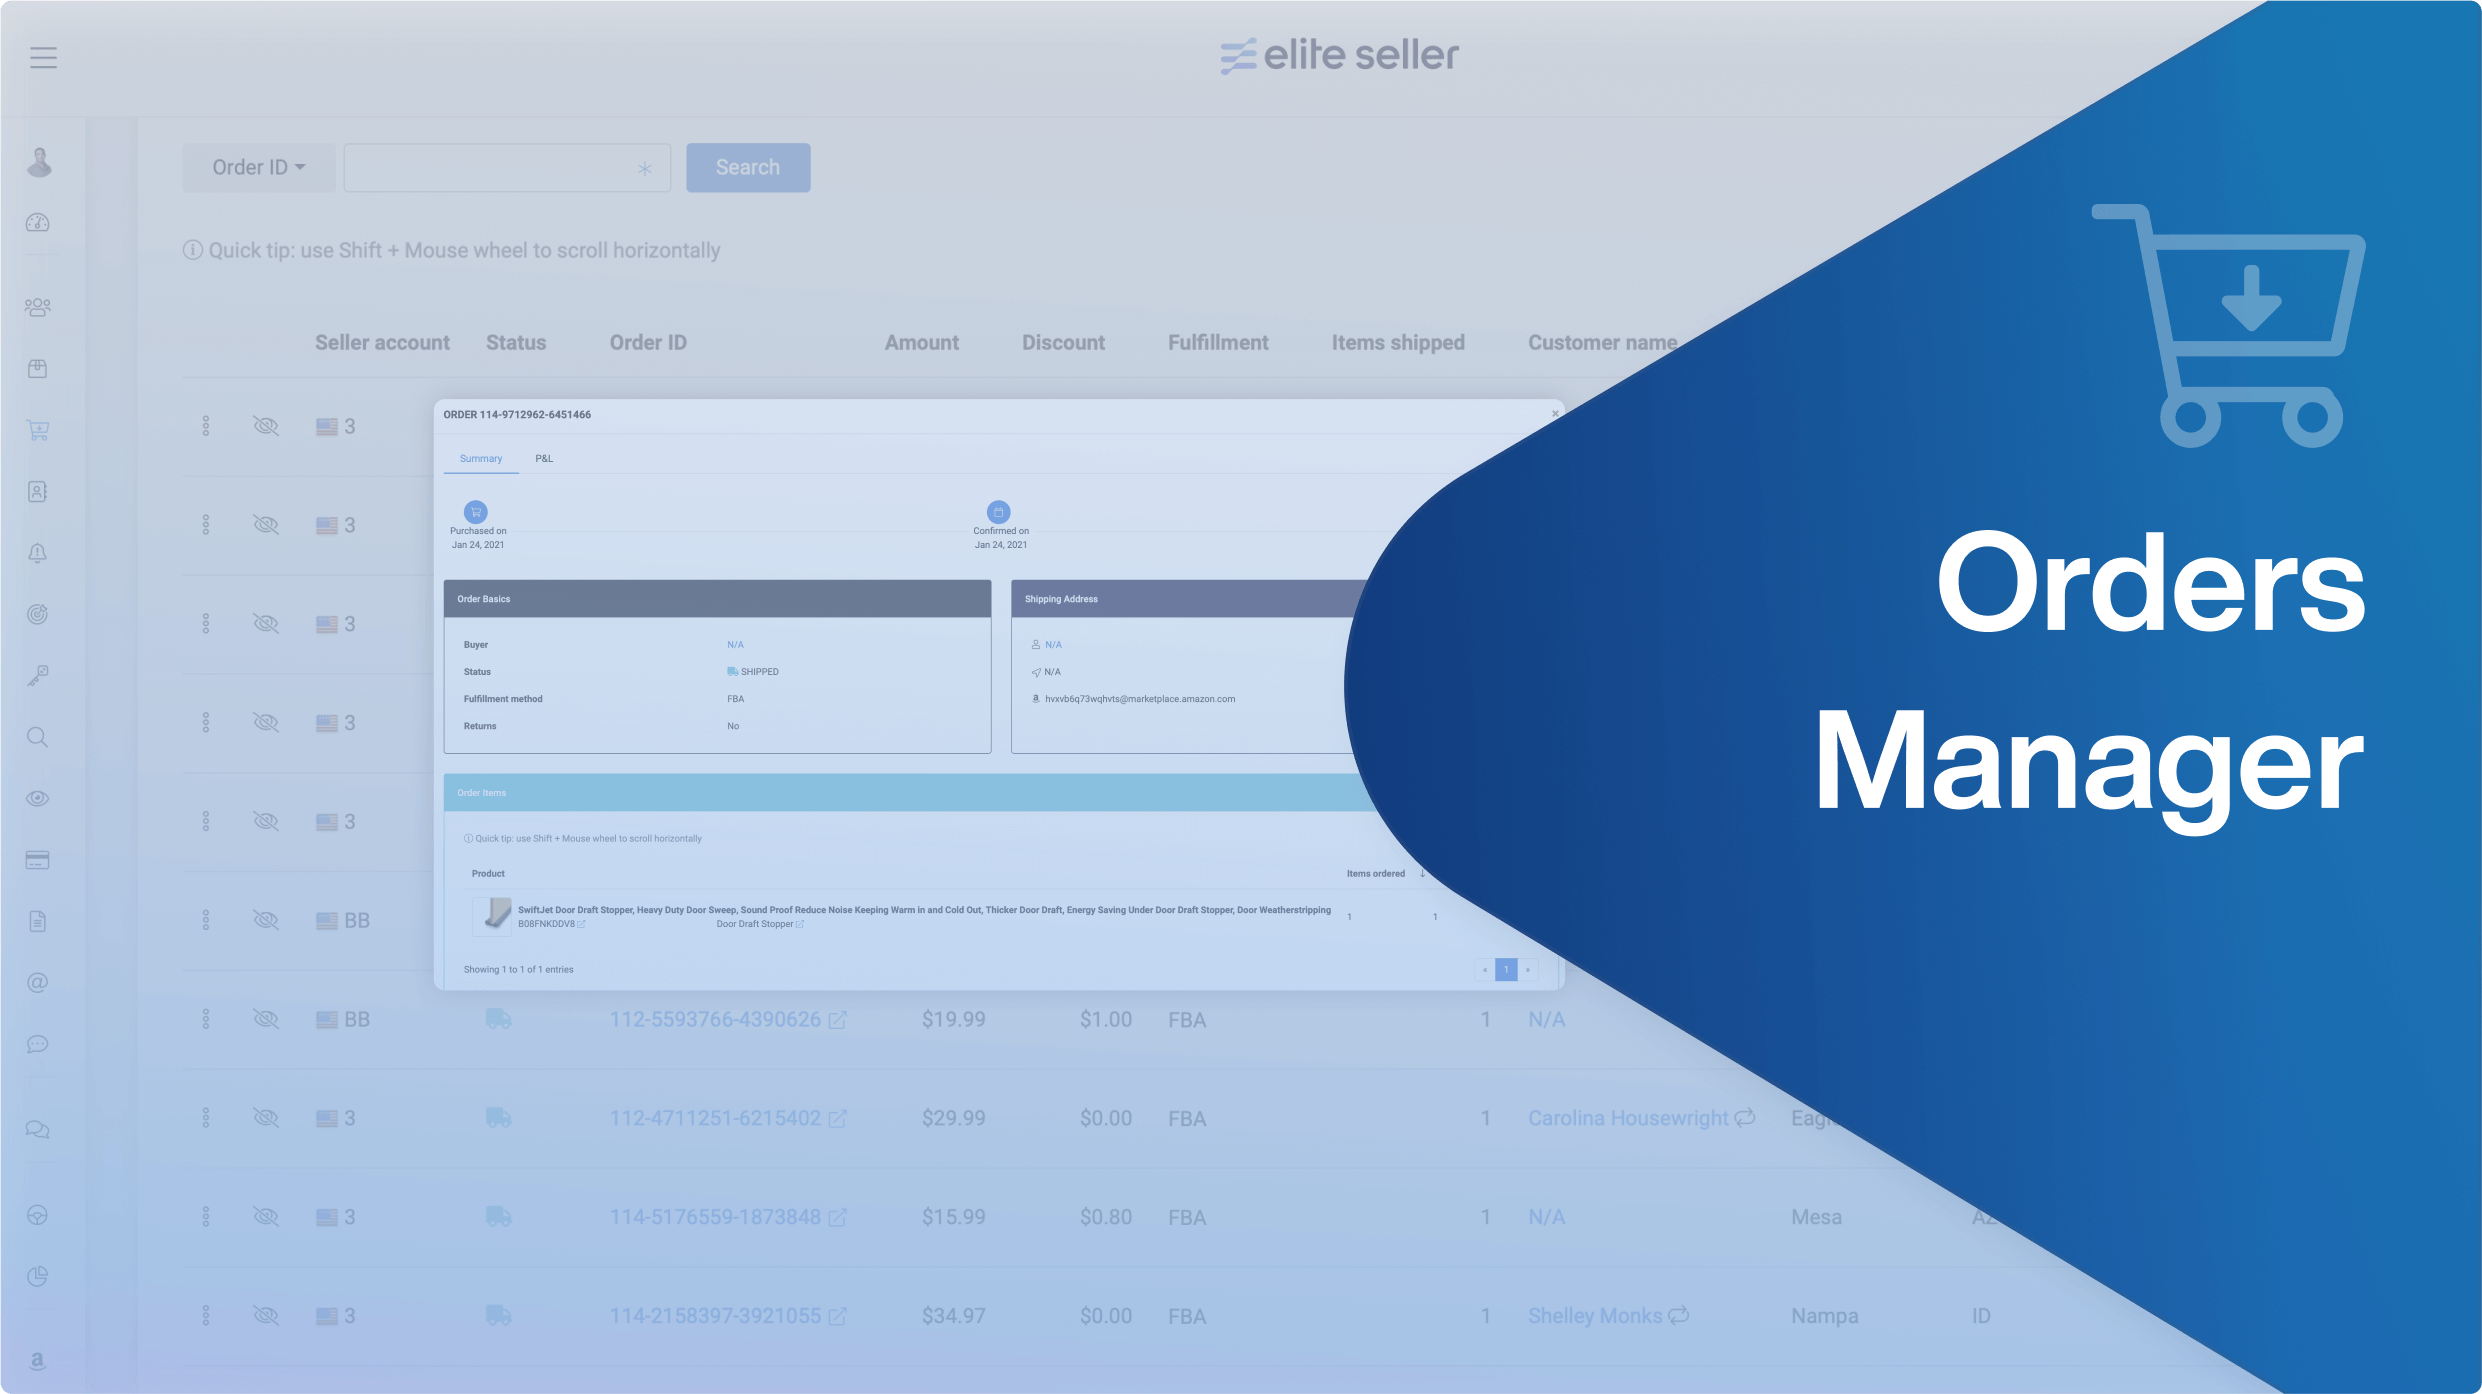
The tool will tell you If your products are active, inactive, and even if you are out of stock based on the inventory column in the right.
How to Add COGS (Cost of Goods)
In the Cost of goods column, in the ‘Today’ tab you will see the cost breakdown. Depending on the tab you are on, the breakdown column will show you the cogs within the range you selected in that period.

The system will change it automatically, depending on the currency entered on the General Settings.

You can manually add your cogs or bulk upload them using a pre-filled CSV file.
To manually add your COGS:

To Bulk edit COGS:
If you make an error the system will detect it.
Add Multiple COGS with different time ranges

If you click on the + sign, it will deploy all of the children ASINS and the same information mentioned before by column.
If you click on the three dots menu, we have multiple quick tools depending on the product you are on.

On the right side, you have the button ‘Column Visibility’, if you click on it you can select the data that you would like to hide/unhide in order to find the information quicker, or just as you wish to see it; next to it,
Click on ‘reset’ to restore the default view so you do not have to be clicking on each one of them individually.

All of the columns are drag and drop, so you can customize them to have a more organized view, this can be helpful too for the export file.
Export Products Information
The Products module can be shared with other users to manage the users that will have, or do not have, permissions to work with this module, you need to
